
How to Plan a Self-Guided Food Tour in Any City
To plan a self-guided food tour, pick one walkable neighbourhood and one theme, choose 4 to 6 stops that each do one dish well, and order them savoury to sweet with 5 to 10 minute walks in between. Order one small plate per stop, share it, check every stop's opening hours the day before, and set a budget cap per stop. That is the whole method; the rest of this guide is how to do each step well, plus a template you can copy.
A self-guided food tour (also called a DIY food tour or food crawl) is a route of several food stops you plan and walk yourself, eating one signature dish at each, instead of booking a guide. It fits an afternoon or a long lunch, it costs only what you eat, and you choose the places. The trade-off is that the research is on you. This guide covers one neighbourhood in one day; if you are planning several days around food, our guide on how to plan a food trip covers the multi-day version.
Guided vs self-guided food tours
A guided tour is a good buy when you want context: someone who knows the owners, tells you the history of the dish and handles the logistics. It is also the easy choice for a first evening in a city where you cannot read the menus. A self-guided tour wins when you want to choose the places yourself, go at your own pace, or keep the cost to what you actually eat.
| Guided food tour | Self-guided food tour | |
|---|---|---|
| Who picks the stops | The tour company | You |
| Cost | A fixed ticket per person, set by the operator | Only what you order |
| Timing | Fixed start time and pace | Whenever you like, stop when you are full |
| Context and stories | Built in, the main reason to book | Whatever you read up on beforehand |
| Booking | One booking covers everything | You check hours and book any sit-down stop |
| Best for | A first night, a language barrier, a gift | Repeat visitors, groups of friends, tight budgets |
Ticket prices for guided tours vary a lot by city and by how much food is included, so compare a few operators in your city if you are weighing the two. Nothing stops you from doing both: a guided tour on night one, then your own route later in the trip using what you learned.
One neighbourhood, one theme
The most common mistake on a DIY food tour is spreading the stops across a whole city. Every taxi or metro ride between bites breaks the rhythm, and you spend the afternoon in transit instead of eating. Pick one neighbourhood you can cross on foot in about half an hour, and keep every stop inside it.
Then pick one theme. A theme turns a random list of good places into a tour, and it makes choosing easier because it rules most places out. Good themes:
- One dish, several takes: dumplings, tacos, pastéis de nata, ramen, pizza by the slice. Comparing versions side by side is the most fun format.
- A cuisine: a street-food crawl through a market district, or the regional food of the city you are in.
- A meal in courses: a snack, a main, a dessert and a coffee, each at a different place.
- A market and its surroundings: start at the market hall, then the stalls and bakeries around it.
To find the places themselves, start with sources that are not built for tourists: local critics, local-language reviews and friends who have been. Our guide on how to find good restaurants when traveling covers how to spot tourist traps and where locals actually eat.
How many stops? 4 to 6, small plates, shared
Four to six stops is the sweet spot for an afternoon. Fewer than four feels like an ordinary meal out; more than six and most people are too full to enjoy the last two. The trick is portion size: order one signature dish per stop, not a meal, and share it. A pair or a group of four can split most plates, which means you can taste more and spend less.
Plan about 20 to 40 minutes per stop, including ordering and eating. A six-stop tour with short walks takes roughly three to four hours, which is why most self-guided tours run from late morning to mid-afternoon or from late afternoon into the evening.
Order the stops: savoury to sweet, 5 to 10 minute walks
Order matters more than people expect. A good route has a shape:
- Start light and savoury. A snack, a bakery item or a soup gets you going without filling you up.
- Put the main event second or third. The dish you came for deserves an empty-ish stomach.
- Move to lighter savoury or a palate break. Pickles, a salad, a tea or a coffee.
- End sweet. Ice cream, pastries or a dessert specialist. Ending on the sweet stop also gives you a natural finish line.
Keep the walks between stops to 5 to 10 minutes. That is long enough to make room for the next bite and short enough that nobody loses interest. If one stop is a 20-minute walk from the rest, drop it or move it to the end. Draw the route on a map before you go: if the line zigzags back and forth across the neighbourhood, reorder the stops until it reads as one loop or one line.
Opening hours and booking
Opening hours are where DIY food tours fall apart. Small, specialised places are the best stops and the most likely to keep short hours, close one day a week, close between lunch and dinner, or sell out of their signature dish early. The night before, check each stop:
- Is it open on your day and at the time you plan to arrive? Check the place's own website or social account, not only a map listing.
- Does it sell out? Bakeries and dumpling counters often do. Put those stops early.
- Do you need a booking? Counters and stalls usually do not; a sit-down restaurant in the middle of your route might.
- Will a group fit? Six people at a four-seat counter means waiting in shifts.
Always have one backup for each stop, ideally on the same street. That way a closed door costs you two minutes, not the whole route.
Budget: set a cap per stop
A self-guided tour costs exactly what you order, which is the main money advantage over a booked tour. The easiest way to stay on budget is a cap per stop: decide what one shared dish plus a drink may cost, multiply by the number of stops, and add a small buffer for the stop you will love and order twice at. Carry a card and some cash, in case a small stall does not take cards.
Planning a food tour with a group
Groups make food tours better, because more people means more dishes to share. They also make them slower. A few rules that help:
- Collect dietary needs first. One vegetarian or one nut allergy can change half the route. Check menus for every stop, not only the ones you suspect.
- Order for the table. One person orders a set number of plates per stop; everyone shares. It is faster than six separate orders.
- Split money once. One person pays all day and the group settles at the end, rather than splitting the bill six times.
- Share the route in advance. Send everyone the stops and times so late arrivals can join at stop two.
If the afternoon turns into an evening, the same planning rules apply to drinks; our guide on how to plan a bar crawl covers that part.
Build the route in 5 minutes with Crumble
You can do everything above with a map and a notes app. If you want a head start, Crumble's Explore offers two ways to get a route, one free and one part of Crumble Plus. The app itself is a web app in English that runs in any browser and can be added to the home screen on iPhone and Android; there is no app-store app and it needs a connection.
Free: start from a ready-made day
Open a city in Explore and you get "A day in {city}": a ready-made day with 3 or more stops, built from the places Explore already shows in that city (trending spots, staff picks and places your friends liked). No AI is involved. Use the arrows to step through the city's ready-made days. When one is close to what you want, pin the stops you want to keep and tap "Another" to swap the rest. Each stop shows an estimated walking, cycling or driving time (marked ≈, based on distance, not a routed path), and links to Google Maps for real directions. There is no public transport mode, which suits a walking tour anyway.
Crumble Plus: ask the AI day planner
With Plan my day, part of Crumble Plus (free 30-day trial, no card), you type a wish in plain words, such as "dumplings, 5 spots", and get a day with that many stops. The number in your wish sets the stop count (3 to 8). Add "finish with ice cream" to keep a dessert stop last. Chains and generic fast food are left out unless you ask for them, rules like "no fish" or "only street food" are respected, and stops stay within 2.5 km of the city centre. The planner also searches the web for places Crumble does not know yet, and only keeps finds that match a real address.
Two honest limits: the AI fits stops to fixed meal slots (breakfast, lunch, afternoon, dinner, drinks) and you cannot set the hours or the travel mode, and because stops stay near the centre, a neighbourhood far out of town may not work. Treat the result as a first draft, then apply the rules above: check the walking order, check every opening time, and swap anything that breaks the theme. We compare AI planners in more depth in our AI food trip planner guide.
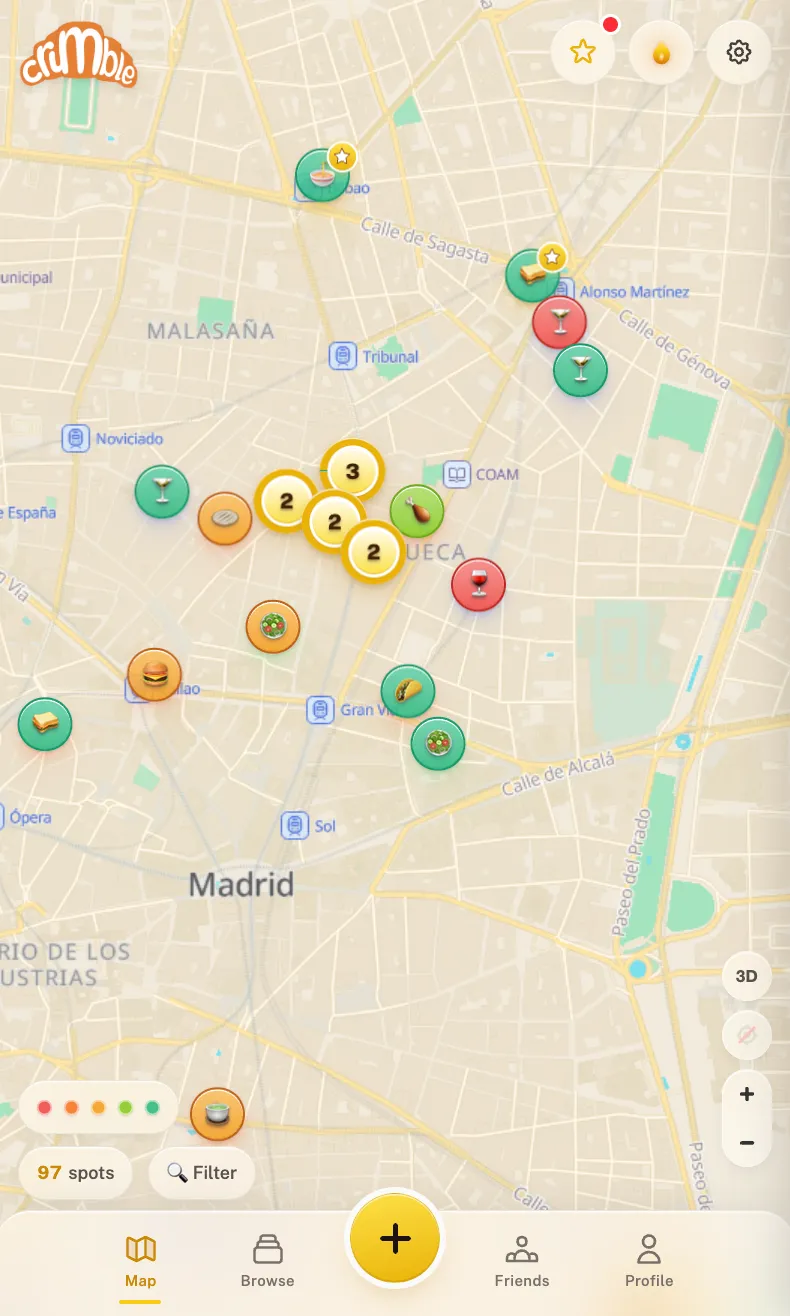
Either way, tap "Save as trip" to keep the day as a trip. From there you can reorder stops, add your own (a viewpoint between two bites, say), invite friends, and share it with a link. All of that is free.
Copyable food tour template
Copy this table into a note or a spreadsheet and fill in your own stops. The example values show a dumpling-themed afternoon for two people; replace the budget with your own cap in local currency.
| Stop | Time | Dish (shared) | Budget cap | Walk to next |
|---|---|---|---|---|
| 1. Bakery or snack counter | 12:00 | Savoury opener, one portion | 8 | ≈ 6 min |
| 2. The dumpling place you came for | 12:40 | House dumplings, one basket | 12 | ≈ 8 min |
| 3. Second dumpling spot (a different style) | 13:30 | Fried or soup dumplings to compare | 12 | ≈ 5 min |
| 4. Palate break | 14:15 | Pickles, greens or a tea | 6 | ≈ 7 min |
| 5. Dessert specialist | 14:50 | One sweet dish | 8 | End |
| Total | ≈ 3 hours | 5 shared plates | 46 + buffer | ≈ 26 min walking |
Add one backup per stop in a sixth column if you like, and the opening hours for the day you go. Before you leave, check the route once more on a map: if any walk is longer than about 10 minutes, swap that stop for a closer one.
After the tour
The best part of a food tour is the argument afterwards about which dumpling won. Rate each dish while you still remember it: in a week the five stops will blur together. If you want that record on a map, our guide on how to track food on your travels shows how.
Frequently asked questions
How do I plan a self-guided food tour?
Pick one walkable neighbourhood and one theme, then choose 4 to 6 places that each do one dish well. Order them from savoury to sweet with 5 to 10 minute walks between stops, check every opening time the day before, and set a budget cap per stop. Share one small plate at each place.
How many stops should a food tour have?
Four to six stops works for most people. Fewer than four feels like an ordinary meal; more than six and you are too full to enjoy the last ones. Order one signature dish per stop and share it, and plan 20 to 40 minutes per stop, so six stops take about three to four hours.
Is a self-guided food tour cheaper than a guided one?
Usually, because you pay only for what you order and can share plates. A guided tour charges a fixed ticket that covers the guide, the planning and the food. It is worth it when you want stories and context or cannot read the menus; otherwise a self-guided route gives you more control over cost.
What is the best order for food tour stops?
Start with something light and savoury, put the dish you came for second or third, add a palate break such as pickles or tea, and end with dessert. Keep each walk short, around 5 to 10 minutes, and draw the route on a map so it forms one line or loop instead of zigzagging.
Is there an app that plans a food tour for you?
Crumble does it two ways. Free ready-made days give you 3 or more stops in a city; pin the ones you like and tap "Another" to swap the rest. The AI day planner, part of Crumble Plus with a free 30-day trial, builds a day from a wish like "dumplings, 5 spots".
What should I bring on a DIY food tour?
Bring a phone with the route and backups saved, a card and some cash for small stalls, water, wet wipes or napkins, and a bag for leftovers. Wear comfortable shoes, since you will walk between every stop, and leave room in the schedule for one unplanned stop you find on the way.
Plan your first food tour
Ready-made days in Explore are free. Open a city, pin the stops you like, swap the rest, and save the day as a trip.